Groups and roles
A Group is a collection of People who occupy Roles within the Group. Groups can represent organizational, educational, and social constructs within your church.
Example: A Group called "Friday Night Bible Study" might have Roles like Leader, Assistant Leader, and Member. If 16 people are assigned to this group, 13 may be Members, 2 may be Assistant Leaders, and 1 may be the Leader.
Groups Dashboard
The Groups menu opens a dashboard with:
- Group list with filter/search and live counts
- Group types quick access
- Reports — membership, attendance, and directory exports in one place
- Group Map — view groups with members plotted on the map
- Group Settings panel — for type and role configuration
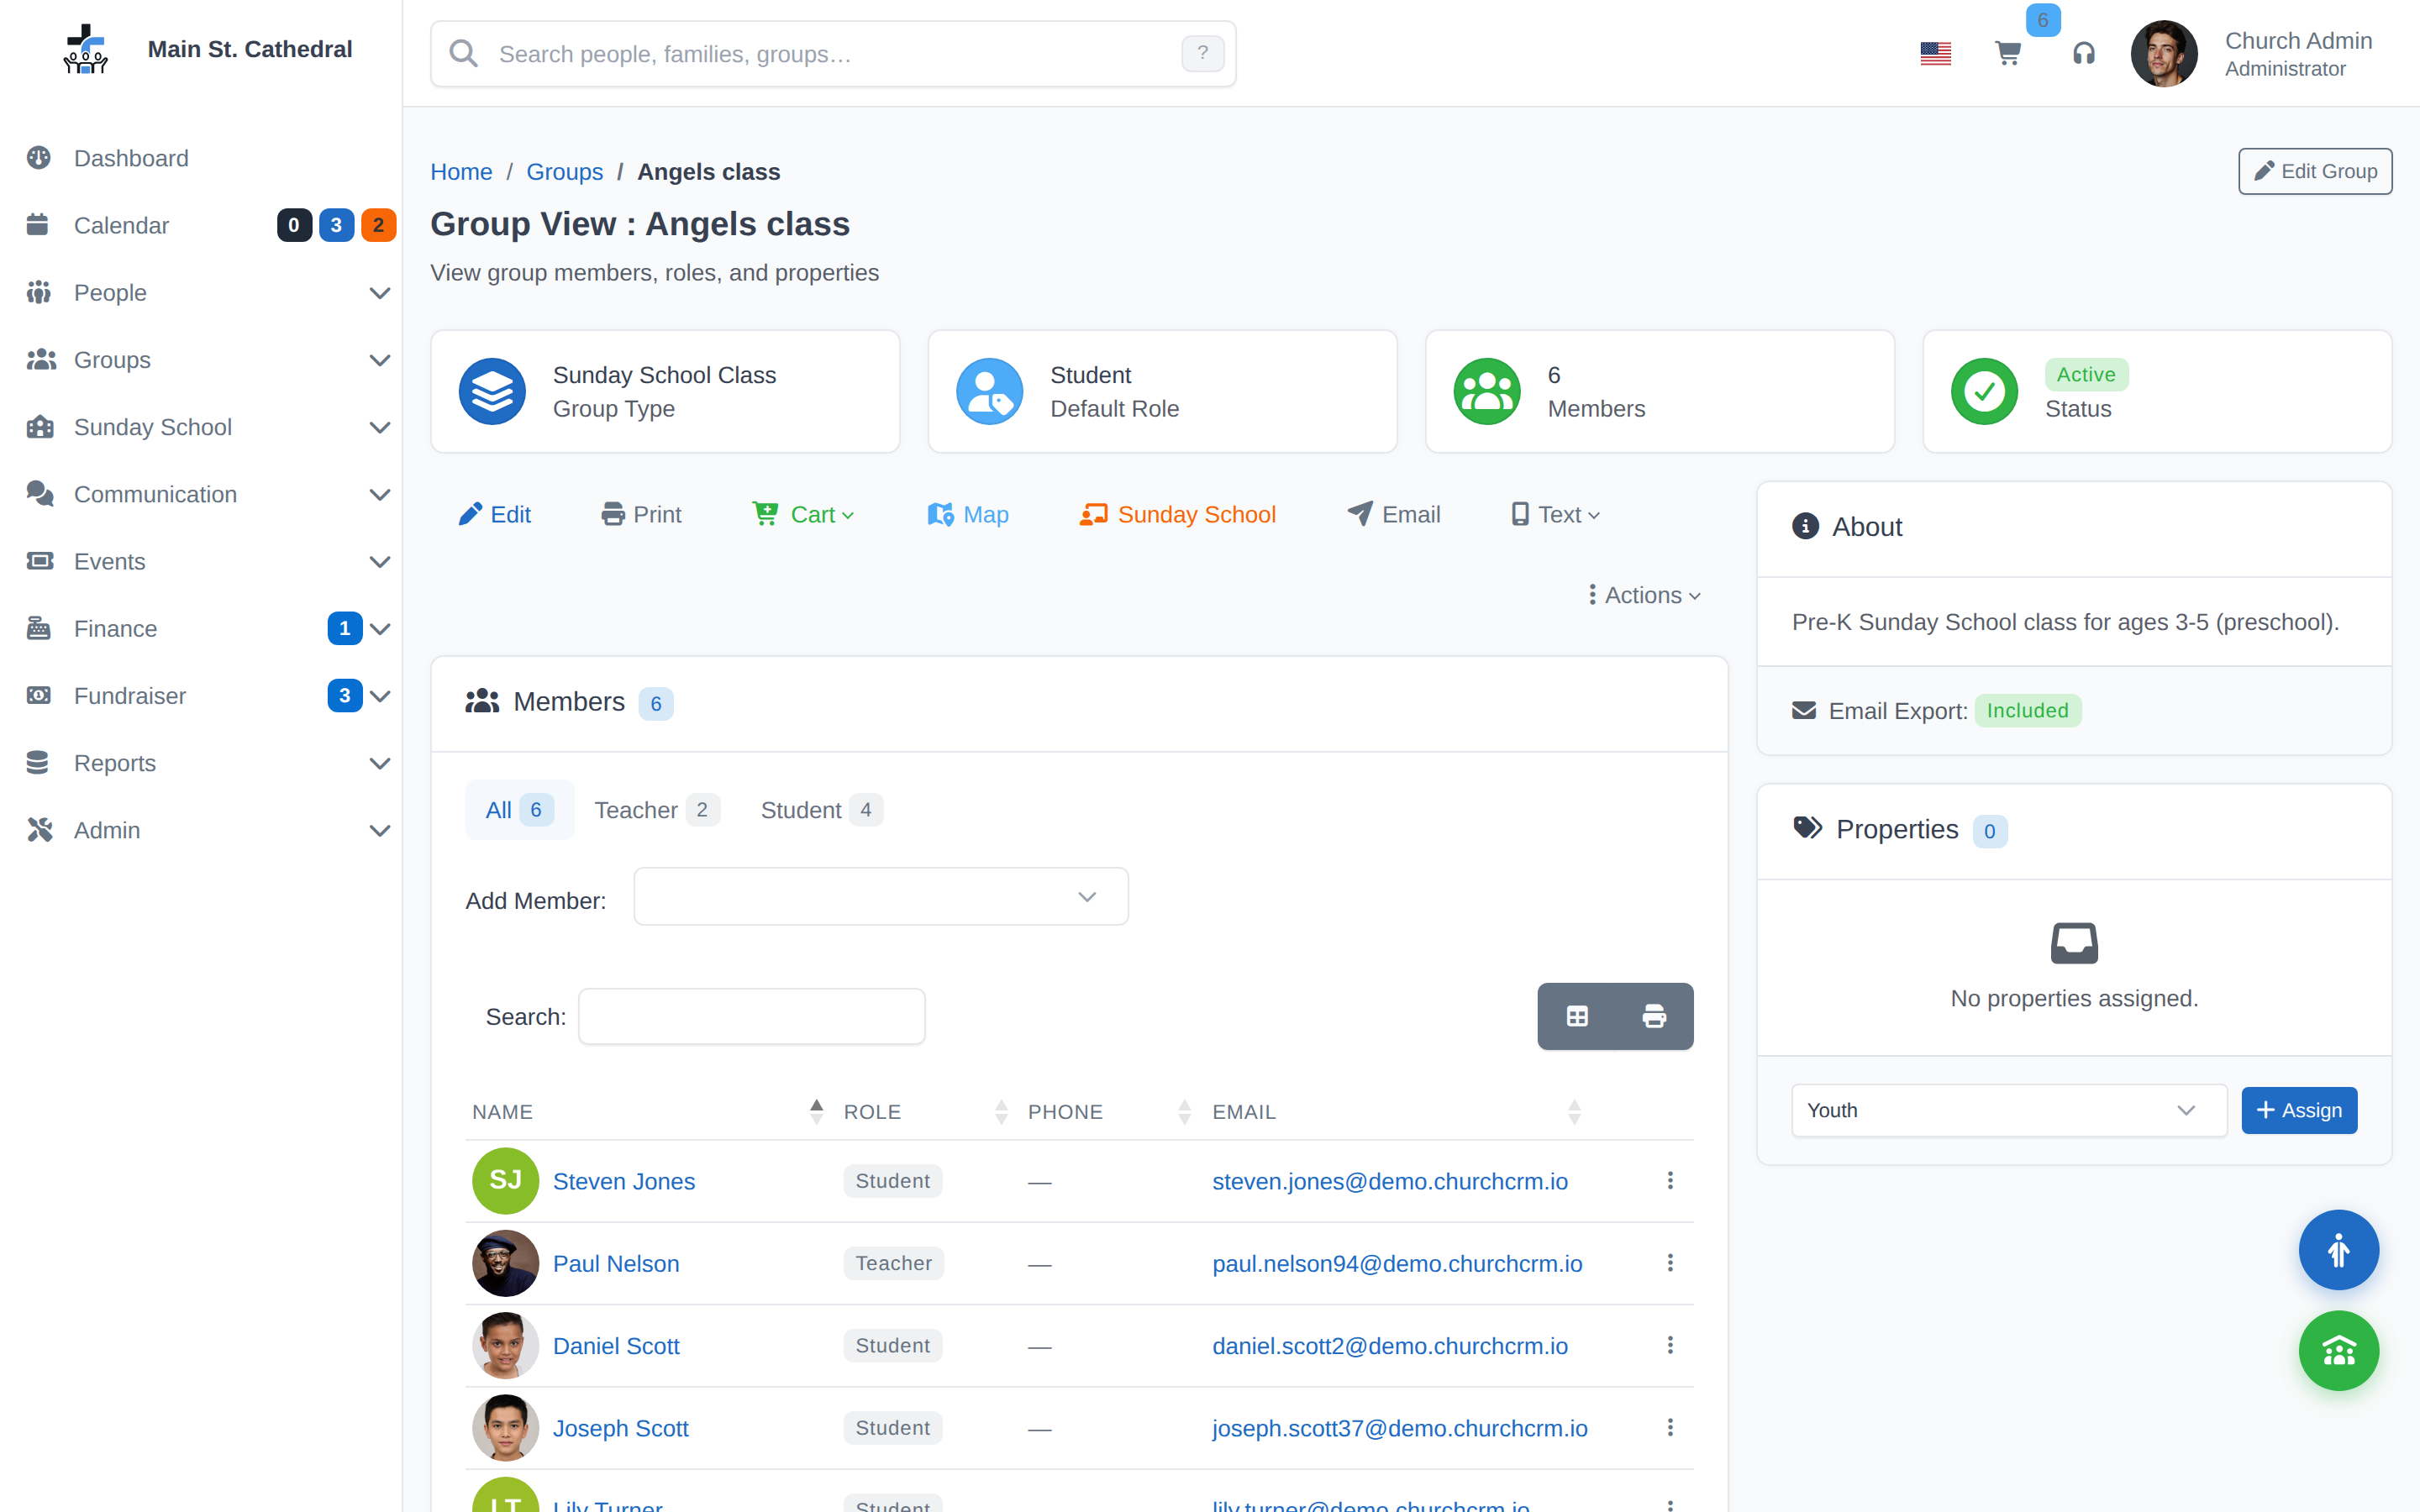
Click any group to open the Group View page, which has been rebuilt as a modern MVC page with an offcanvas editor, inline role changes, and a dedicated tab for Sunday School classes.
Key Features
- Map This Group — plots all group members on a Leaflet map directly from the Group View page, useful for geographic outreach planning.
- Text — copies phone numbers or opens the device messaging app for everyone in the group, or for one role. See Text Messages.
- Kiosk check-in for all groups — any group can be assigned to a kiosk station, not just Sunday School. Link a group to an event, then assign that event to a kiosk device.
- Event roster with member photos — group event rosters show member photos on each row with improved badge contrast.
Step-by-step: Creating a Group
- Go to Groups → Dashboard, then click Add New Group (top-right of the page).
- Enter Group Name (e.g., "3rd Grade Sunday School").
- Enter Description (optional).
- Choose Group Type (e.g., Sunday School, Small Group, Committee).
- A default "Member" role is created — add more roles if needed (Leader, Teacher, etc.).
- Click Save.
Adding People to a Group
- Search for people or go to People → Person Listing.
- Add the people to the Cart.
- Open the cart and choose Empty Cart to Group.
- The page title is Add Cart to Group. Select the group and, if you want, a role, then click Add to Group.
Empty Cart to Group
Empty Cart to Group assigns everyone currently in the cart to one group. The page title is Add Cart to Group.
How to use Empty Cart to Group
- Add the people to the Cart.
- Open the cart and choose Empty Cart to Group.
- Select the Group.
- Optionally select a Role. If you leave it blank, people are added in the group's default role.
- Click Add to Group.
All members of the cart will be added to the specified Group if they do not already exist in that Group. Existing members will not be duplicated.
Create Group + Add Cart
Use the Create Group + ADD Cart button to create a brand-new group and assign all current cart members to it in a single step. This is useful when you want to quickly form a new group from a set of search results or report output without first creating the group manually.
Ministry pool groups
When Volunteer Management (v2) is on, every ministry created under Ministries gets a pool Group of its own, listed here by the ministry's name. Its members are the ministry's volunteers, and you can add or remove members here like any other group. The Group's identity, though, belongs to the ministry: its page says "This group is the volunteer pool of …", and Edit and Delete are disabled — deleting the ministry deletes the Group. Which positions each member can serve in is set on the ministry's Volunteers tab, not with group roles.
A Sunday School class whose teachers come from a ministry team says so on its group page, and its Teacher role can then be changed only from the ministry. See Linking a team to a Sunday School class.
Every pool Group has the type "Ministry", but giving a Group that type does not make it a v2 ministry: it is just a group with that label. A v2 ministry is created from Ministries → Dashboard → New ministry, uses positions rather than group roles, and is where schedules, assignments and reminders live.
Common Uses for Groups
- Bible study classes
- Ministry teams
- Sunday School classes
- Volunteer teams
- Committees
- Small groups
How do I add a new Group?
-
Go to Groups → Dashboard, then click Add New Group (top-right of the page).
-
Complete the form.
-
Press "Save".
-
When a new Group is created, a Role of "Member" is automatically created and assigned as the Default Role for that Group. (You may immediately change the name of this role, however.)
How do I change the Name/Description/Type of a Group?
-
Go to Groups → Dashboard.
-
Click on the desired Group to open its Group View page.
-
Click the edit (pencil) icon in the Group View header to open the offcanvas editor.
-
Update the group name, description, or type in the editor.
-
Click Save.
How do I add a new Role to a Group?
-
Go to Groups → Dashboard.
-
Click on the desired Group to open its Group View page.
-
Click the edit (pencil) icon in the Group View header to open the offcanvas editor.
-
In the Group Roles card, click the Add Role button (top-right of the card).
-
An Add New Role dialog appears. Type the name of the new Role in the Role Name field.
-
Click Add Role (or press Enter) to confirm.
The new Role appears in the roles table immediately. The Add Role button in the dialog is disabled until you enter at least one character.
Sunday School groups have two protected roles — Student and Teacher — that cannot be renamed or deleted. You can still add extra roles to a Sunday School group.
How do I change a Role in a Group?
-
Go to Groups → Dashboard.
-
Click on the desired Group to open its Group View page.
-
Click the edit (pencil) icon in the Group View header to open the offcanvas editor.
-
In the Group Roles table, click the role name in the Role Name column and type the new name.
-
Click or tab away from the field — changes are saved automatically when the input loses focus. No separate "Save" button is needed.
Role name changes take effect immediately. The success notification confirms the save.
How do I delete a Role from a Group?
-
Go to Groups → Dashboard.
-
Click on the desired Group to open its Group View page.
-
Click the edit (pencil) icon in the Group View header to open the offcanvas editor.
-
In the Group Roles table, click the trash icon (🗑) in the Delete column for the role you want to remove.
-
A Delete Confirmation dialog appears, asking: "Are you sure you want to remove the role '…'?"
-
Click Delete to confirm, or Cancel to abort.
If the role you are trying to delete is the only remaining role in the group, a warning is displayed in the confirmation dialog and the Delete button is disabled. You must add at least one other role before you can delete this one.
The Student and Teacher roles in Sunday School groups are protected — their delete button is disabled and shows a tooltip: "This role cannot be deleted."
What is the Default Role?
Every Group has a Default Role, which is simply the "standard" Role for a Member of that Group. For a class, for instance, the Default Role might be Student, because 95% of the people in the class will be Students. There will be other Roles -- Teacher, Assistant Teacher, etc. -- but most everyone will be a Student, so that's the Default Role.
Default Roles allow you to quickly add new Members to a group. If you have 200 People in your Cart, you don't have to specify Roles for every record to dump the Cart to a Group, they are simply added as the Default Role. This also allows quick sorting of the organizers of a Group. The Group View producers all Members of a Group who do not occupy the Default Role, which are usually the organizers and administrators of the Group.
How do I change the Default Role for a Group?
-
Go to Groups → Dashboard.
-
Click on the desired Group to open its Group View page.
-
Click the edit (pencil) icon in the Group View header to open the offcanvas editor.
-
In the Group Roles table, click the Default button next to the role you want to set as default. The current default role shows a checkmark (✓ Default) instead of a button.
What is Group Type?
Group types allow you to categorize your groups. For example, a group called "Gleaners Class" can be type "Sunday School" and a group called "Franklin House" can be type "Cell Groups". This helps in further classifying groups so that you don't have to memorize which group is associated with which type.
How do I set a Group Type?
When a new group is created, you are given the option to set the group type.
How do I change the available Group Types?
Go to Groups → Admin → Group Types. The page title is Group Types Editor. Add New Group Type adds a type. Reorder with Move up and Move down.
What are Group-Specific Properties?
Group-Specific Properties is a powerful feature that allows you to add any fields that you need to use that do not come built-in with ChurchCRM. This feature allows you to, for example, add a Mentor to a person, or add an additional date (such as confirmation). The possibilities are endless.
How do I use Group-Specific Properties?
See the Custom Fields help topic.
How do I add People to a Group?
-
Add the desired people to your Cart.
-
With people in the cart, open the cart and choose Empty Cart to Group. The page title is Add Cart to Group.
-
On the resulting screen, select the desired Group, then press "Add to Group".
All members of the cart will be added to the specified Group if they do not already exist in that Group. If a Person in the cart already exists in the specified Group, that Person will not be added again.
All People will be added to the Group in that group's Default Role, unless you select a specific Role.
How do I change the role of a Person in a Group?
-
Go to Groups → Dashboard.
-
Click on the desired Group to open its Group View page.
-
Members are listed on the group page. There is no View Members step.
-
Find the member and click Change Role.
-
Choose the new role.
-
Click Save.
What is "Add Group Members to Cart"?
Adding group members to the cart is an easy way to add a group of individuals to the cart. Right now, the cart can be used to add individuals to a group. However, in future releases, the cart will be able to make group mailing lists and other features.
For more information, see the Cart help topic.
How do I assign a Property to a Group?
See the Properties help topic.
Can't find what you need? Ask in Discord, or open an issue on the ChurchCRM repository.