Custom Fields
Custom Fields allow you to expand the functionality of ChurchCRM beyond the base information that can be stored as a default. Custom fields allow you to personalize the database to meet your specific needs. Custom fields can be added to persons, families, and groups. For persons, you could, for example, have a custom field that shows an individual's mentor. For groups, you could have a start and stop date for a group of ushers.
How do I assign Custom Fields?
For people and families
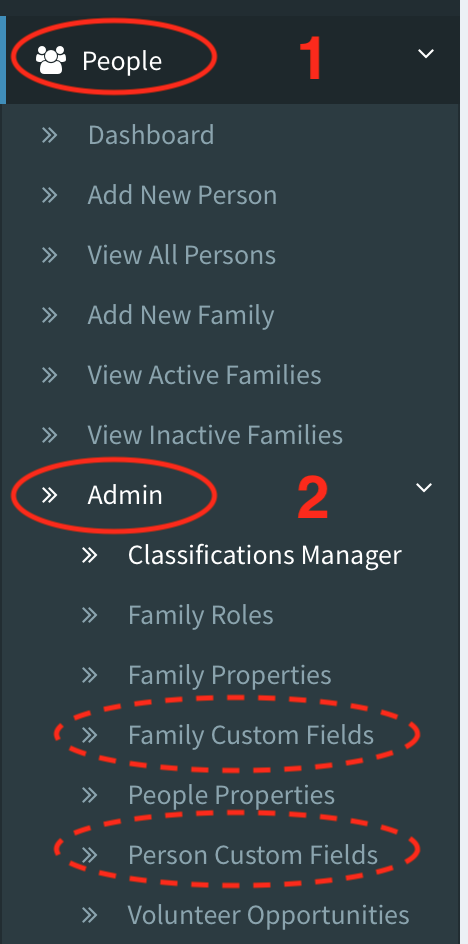
- Click the "People" menu on the left side panel
- Then click "Admin"
- For people click on "Person Custom Fields"
- For families click on "Family Custom Fields"
- To add a new field, select the type, a name and the side on which it should appear along with any security options this new field requires.

- The name will appear in the shaded box on Person View and the side determines which column it shows up in when viewing the Person View.
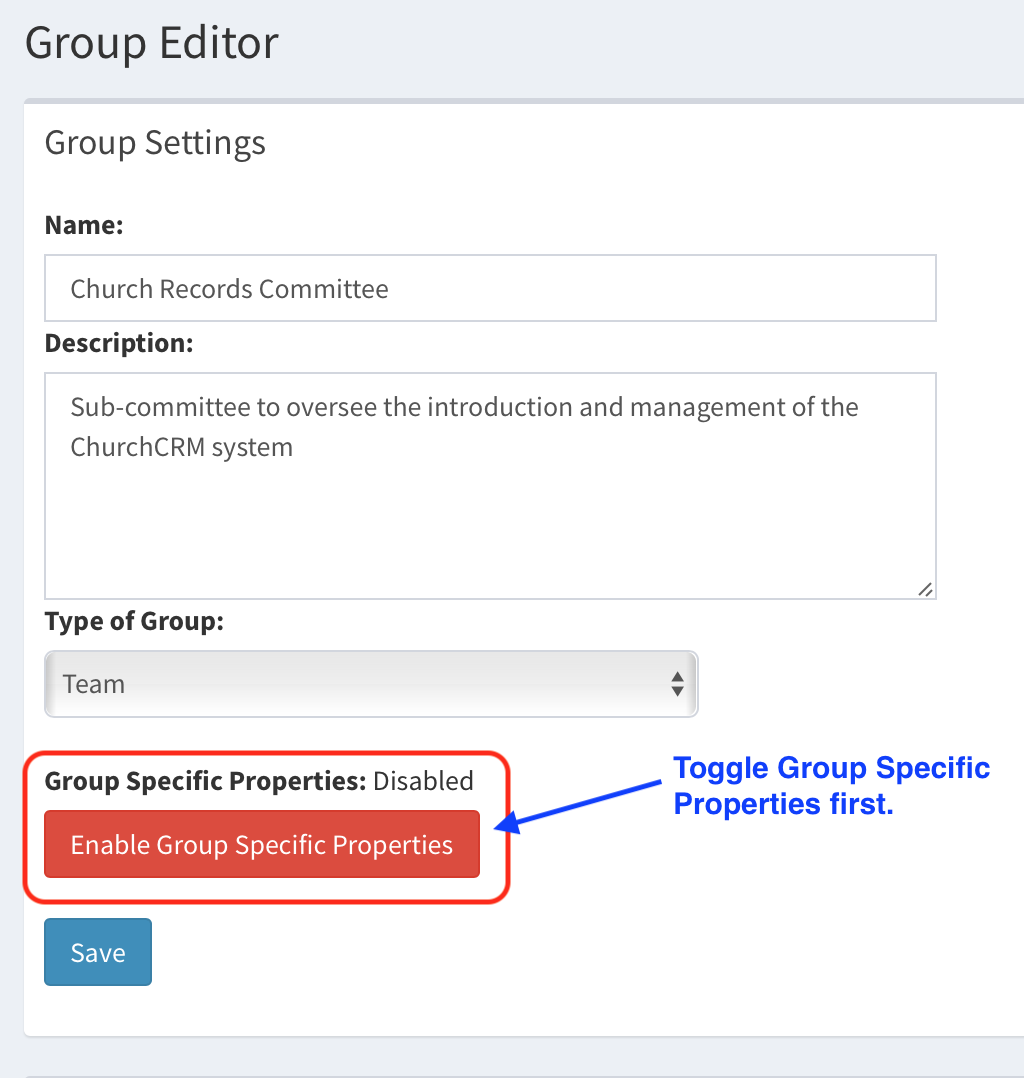
For groups
- Click on the group you wish to add a custom field to, and ensure Group Specific Properties has been enabled. When prompted, answer
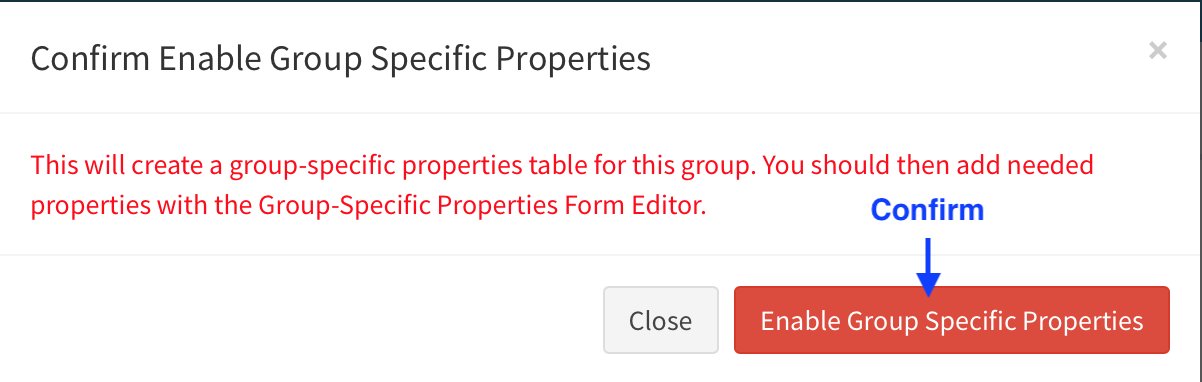
 Then confirm...
- Click on "Edit Group-Specific Properties Form".
If this link is not visible, this group may not have group-specific properties enabled (see step 1 above).
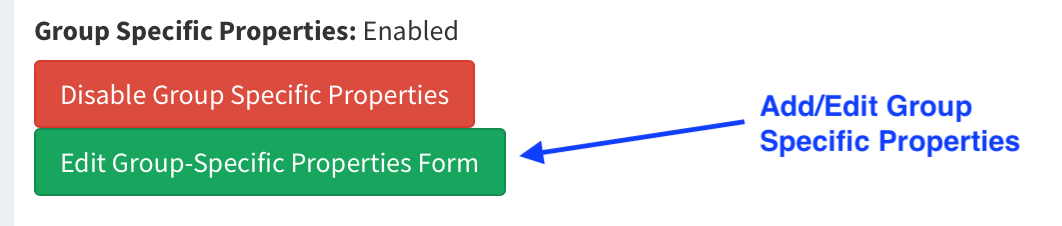
- To add a new field, select the type, name, description and click "Add New Field".

What are the Types?
See the Custom Fields Types help topic.
Common Use Cases
Custom fields enable you to track virtually any information about people, families, or groups. Here are some popular examples:
Adding a Nickname Field
Many churches want to track nicknames, preferred names, or "goes by" names for their members. Since ChurchCRM stores formal first and last names by default, you can add a Nickname custom field:
- Navigate to People → Admin → Person Custom Fields
- Add a new field with these settings:
Setting Value Type Text Field (50 Character) Name Nickname (or "Goes By", "Preferred Name") Side Left or Right (your preference) Security bAll (or appropriate security level) - Click Add New Field
Now when viewing or editing any person's record:
- The nickname will appear in the Custom Fields section on their profile
- You can search notes and reports for the nickname value
- Staff can quickly see preferred names when greeting members
💡 Tip: Encourage data entry volunteers to add nicknames during check-in or new member registration to keep this field populated.
Other Popular Custom Fields
| Use Case | Recommended Field Type | Example |
|---|---|---|
| Spiritual Mentor | Person From Group | Link to a mentor from "Mentors" group |
| Baptism Date | Date | Track when members were baptized |
| Confirmation Date | Date | Record confirmation ceremonies |
| T-Shirt Size | Custom Drop-Down List | S, M, L, XL, XXL |
| Dietary Restrictions | Text Field (100 Character) | Vegetarian, Gluten-Free, Allergies |
| Emergency Contact | Text Field (100 Character) | Name and phone number |
| Employer | Text Field (50 Character) | Workplace name |
| Spiritual Gifts | Text Field (Long) | List of identified spiritual gifts |
| Ministry Interest | Custom Drop-Down List | Music, Children, Outreach, etc. |
| Membership Year | Year | When they joined the church |
Best Practices for Custom Fields
- Keep names clear and concise - Field names appear on person/family views
- Use appropriate types - Choose the smallest field type that fits your data
- Consider security - Some fields (like health info) may need restricted access
- Document your fields - Keep internal notes about what each custom field is for
- Review periodically - Remove unused fields to keep the interface clean
How do I edit a Custom Field?
Note: When changes are made to the categories in either form, you must click "Save Changes" before anything else or all changes will be lost.
-
For people and families you can change the name, special option, and Person-View side. If the type needs to be changed, it can only be done by creating a new field and deleting the undesired field. If you wish to change the order in which the fields are displayed, use the up and down arrows to the left to move its location. To delete a field, click the "X" on the left side.
-
For groups, you can change the name, description, and person view. Enabling the person view allows this property to be shown when viewing an individual in Person View. If the type needs to be changed, it can only be done by creating a new field and deleting the undesired field. If you wish to change the order in which the fields are displayed, use the up and down arrows to the left to move its location. To delete a field, click the "X" on the left side.